

How to Level a Washing Machine Properly and Stop Excessive Vibration
A washing machine can look straight and still be unstable. Proper leveling means the appliance sits securely from side to side and front to back, does not rock at the corners, and has firm support at every contact point.
Why Proper Washing Machine Leveling Matters
During a spin cycle, the washer drum rotates at high speed. If the machine is supported unevenly, normal movement inside the drum can cause the cabinet to rock between unstable contact points.
That can contribute to excessive vibration, rattling, floor movement, or a washer that gradually shifts away from its original position.
Official guidance from LG, GE Appliances, and Samsung all emphasize the same basic idea: the washer should be level, should not rock, and should have stable floor contact.
The goal: the washer should be level from front to back and side to side, while also remaining firmly planted when you test its corners.
Signs Your Washing Machine May Not Be Level
Washer rocks when pushed
One or more feet may lack secure contact. Test all four corners.
Vibration during most spin cycles
The installation or leveling may need attention. Check both directions.
The machine gradually moves
Poor contact or insufficient floor grip may be contributing. Level first, then inspect the floor contact.
The machine looks level but still wobbles
Bubble alignment may be hiding an unstable foot. Perform the corner-rocking test.
Prepare the Washer and Check the Installation
Do not immediately start turning the feet. First make sure the washer is in its intended position and that the surrounding setup is not creating a separate problem.
Check the Floor
- Clean the contact area.
- Make sure the surface is dry.
- Look for cracks or damage.
- Check whether the floor itself moves.
Check the Setup
- Place the washer in its final position.
- Check required clearances.
- Make sure hoses are not pulling the machine.
- Check pedestals or risers separately.
Safety first: washing machines are heavy. Do not try to lift or tilt one by yourself to reach the feet. Follow the instructions for your exact appliance model.
Test the Washing Machine for Rocking
With the washer turned off, gently test the top corners. The goal is to identify whether the cabinet shifts between support points.
LG recommends checking the machine diagonally from corner to corner. Samsung similarly advises trying to rock and wobble the washer to confirm a solid connection at the corners.
Front corners
Gently test whether the washer shifts from one front corner to the other.
Side to side
Check whether the machine moves between the left and right support points.
Diagonal corners
Test opposite corners to identify a single foot that may lack firm contact.
Important: a centered bubble does not override a rocking washer. If the machine wobbles, its contact points still need attention.
Check the Level From Side to Side
Place a suitable level across the top of the washer from left to right. Make sure the tool is resting on a reliable flat surface rather than a curved control panel or decorative edge.
If the bubble sits away from center, one side needs adjustment according to the leveling procedure for your washer model.
What you are checking: the left and right sides of the washer should sit at the same level while the machine remains firmly supported. Do not focus on the bubble alone; repeat the rocking test after every meaningful adjustment.
Check the Level From Front to Back
Turn the level so it runs from the front of the washer toward the back.
A washer can be perfectly level from left to right while still leaning forward or backward. That is why manufacturers recommend checking both directions.
Side-to-Side Check
Confirms the left and right sides sit evenly.
Front-to-Back Check
Confirms the appliance is not leaning toward or away from you.
Adjust the Washing Machine Feet
Adjust only the feet that need correction and follow the instructions for your exact washer model. Front-load and top-load machines do not all use identical leveling systems.
Some washers have four adjustable feet. Others may use a different arrangement, and older machines can have self-leveling components. The model manual should take priority over generic instructions.
Make small adjustments
Adjust gradually rather than making a large change all at once.
Recheck the bubble
Check both directions after every meaningful adjustment.
Test for rocking again
Make sure the adjustment improved stability rather than only moving the bubble.
Avoid excessive extension: Samsung notes that shorter leveling-leg extension generally provides better stability. Adjust only as much as needed while following your model instructions.
Secure the Lock Nuts if Your Washer Uses Them
Once the washer is stable and level, secure the leveling hardware according to the manufacturer instructions.
On machines that use lock nuts, leaving them loose can allow the adjustment to shift. LG and Samsung both instruct users to tighten the locking hardware after leveling applicable models.
Final static test: before running the washer, check the bubble in both directions one more time and repeat the corner-rocking test.
Run a Test Cycle and Watch the Spin
A washer can feel stable while turned off but still reveal a problem once the drum reaches speed.
Follow the manufacturer's recommended test procedure for your model. Watch for excessive rocking, repeated movement, unusual impact sounds, or the machine shifting away from its position.
The Setup Looks Stable
- No rocking at the corners.
- No major position change.
- Normal spin-cycle movement only.
- No repeated impact against nearby surfaces.
The Washer Still Feels Unstable
- The machine still rocks.
- A foot loses floor contact.
- The washer moves across the floor.
- Vibration remains excessive.
For broader troubleshooting when the machine is still extremely unstable, read why a washing machine may shake violently .
Improve Floor Grip and Vibration Isolation
Leveling should come first. Once the washer is properly adjusted and no longer rocks, you can address the way its feet interact with the floor.
Anti-vibration pads can create a wider contact point, improve grip, provide floor separation, and help dampen some of the vibration that remains during normal operation.
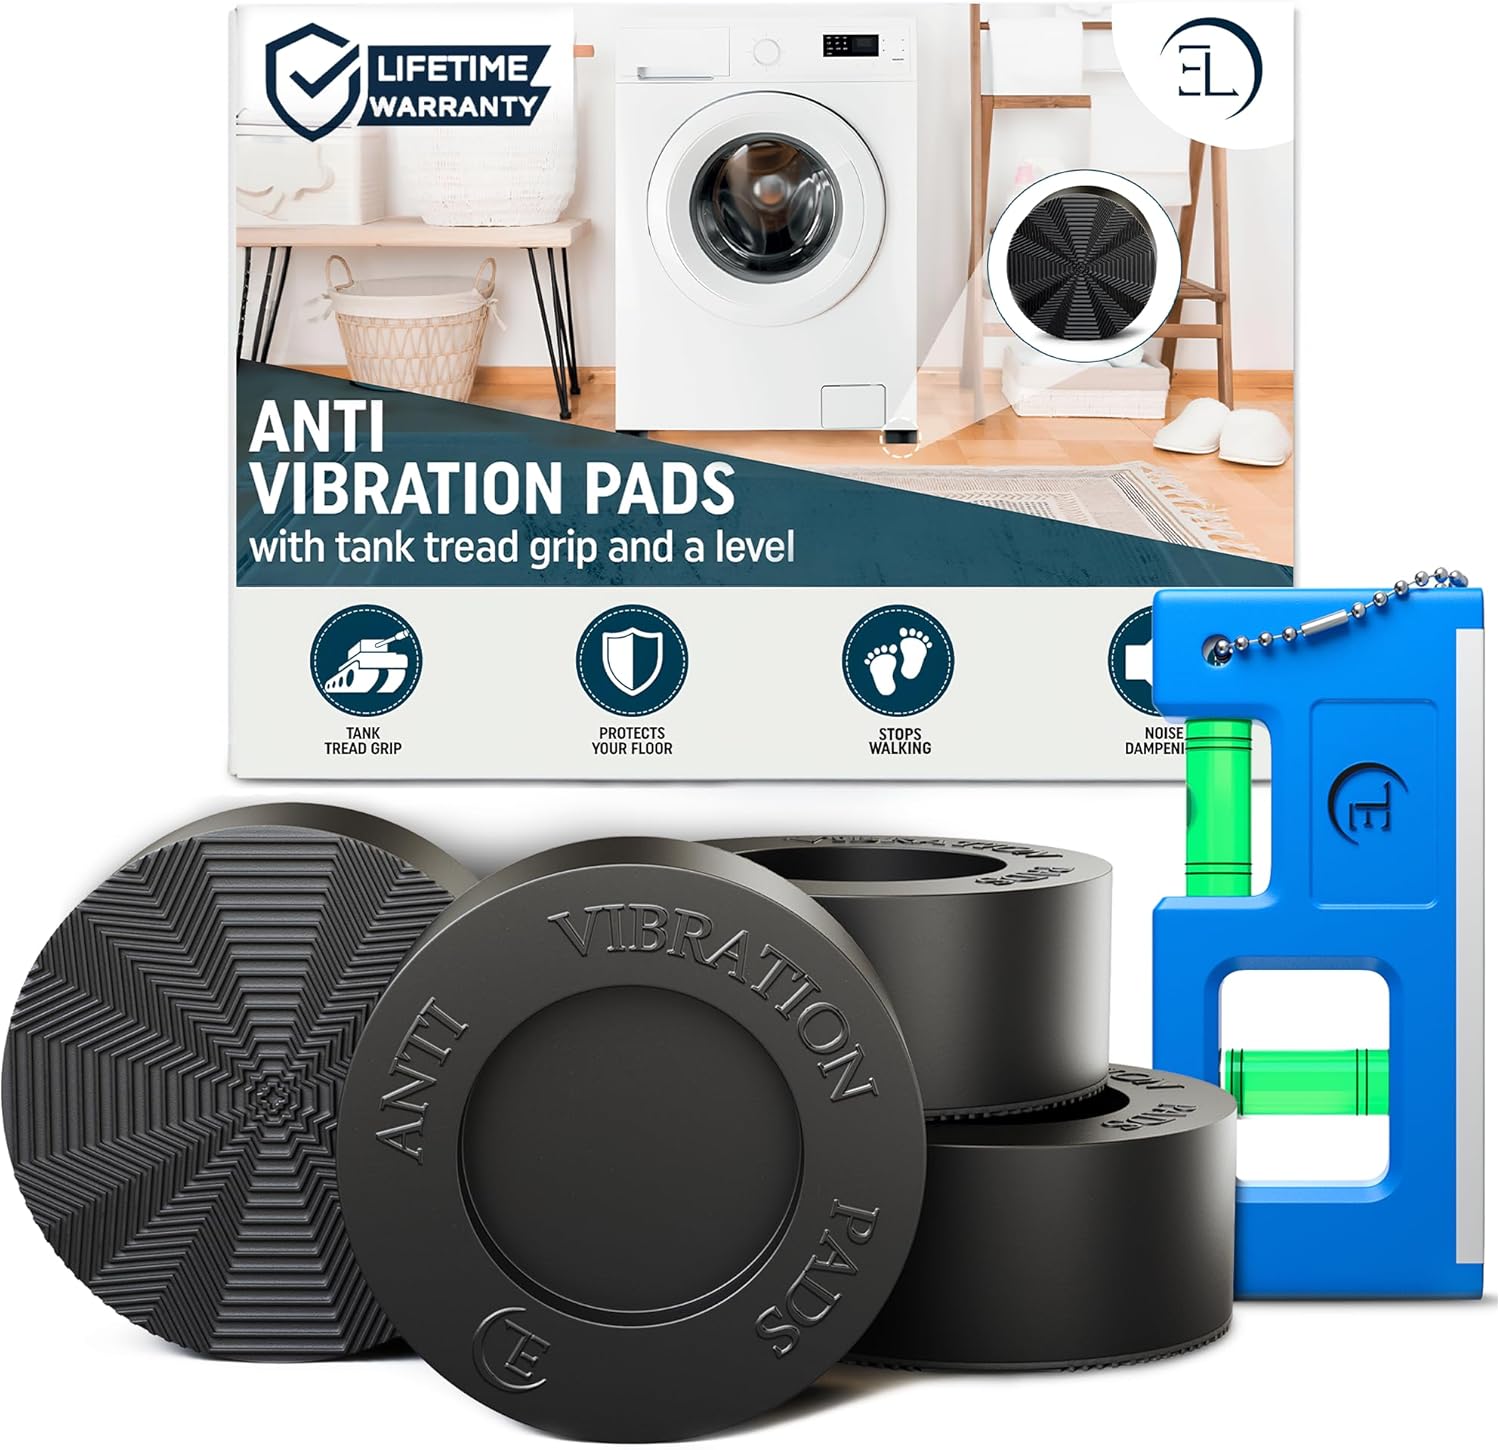
ELEON Anti Vibration Pads for Washing Machines, Dryers & Appliances
The ELEON set includes four anti-vibration pads and a magnetic level, helping you check the appliance setup before adding grip and vibration isolation underneath each foot.
- Includes a magnetic level for horizontal and vertical checks.
- Tank-tread grip pattern helps limit side-to-side movement.
- 3-inch diameter creates a wider base under each appliance foot.
- 1.75-inch opening fits many standard washer and dryer feet.
- 0.95-inch lift adds grip, clearance, and floor separation.
Correct order: install correctly → level the washer → confirm all contact points → test the machine → then add vibration isolation if needed.
6 Common Washing Machine Leveling Mistakes
Checking only one direction
The washer may still lean from front to back. Check both directions.
Ignoring a slight wobble
High-speed spinning can magnify instability. Repeat the corner test until the washer feels planted.
Extending the feet more than needed
A taller support position can reduce stability. Make the smallest required adjustment.
Forgetting the lock nuts
The adjustment may not remain secure. Tighten the locking hardware as instructed for your model.
Skipping the test cycle
Static stability may not reveal spin vibration. Test the machine after adjustment.
Using pads to hide bad leveling
The original instability remains. Level the washer first, then add grip or vibration isolation.
What If the Washer Is Level but Still Vibrates?
Leveling is important, but it is not the cause of every vibration problem.
A properly leveled washer can still shake because of an unbalanced load, shipping hardware, an unsuitable cycle, a drainage problem, poor floor conditions, or an internal mechanical fault.
Keep Troubleshooting
- Unbalanced laundry.
- Slippery floor contact.
- Washer touching nearby surfaces.
- Incorrect installation.
Arrange Inspection
- Grinding or scraping.
- A loose or off-center drum.
- Leaks or electrical smells.
- Persistent violent movement.
If the washer is physically travelling across the floor, use our separate guide on how to stop a washing machine from walking during the spin cycle .
Washing Machine Leveling Checklist
Use this order so you do not miss a stability problem that a centered bubble alone cannot show.
Floor and final position
Aim for a stable, clean support area.
Rocking test
The washer should not wobble between corners.
Side-to-side level
Confirm even left and right support.
Front-to-back level
Confirm there is no forward or backward lean.
Locking hardware
Make sure the final adjustment remains secure.
Test cycle
Confirm stable operation during the spin cycle.
Frequently Asked Questions
A Level Washer Should Also Feel Stable
Check the washer in both directions, confirm every support point, secure the adjustments, and run a test cycle. Once the machine itself is properly leveled, better floor grip and vibration isolation can help control the movement that remains.